Originally I planned to build a particle board fixture to support the fuselage while I worked on replacing the skins. I assumed I needed to remove the long 0.025" panels on the sides of the fuselage which would leave the fuselage very weak. After hammering out the wrinkles in the 2 top panels I could see the side panels were not damaged and did not need to be removed. I also kept worrying about the rain warping a wood fixture.
Instead I've decided to use one of my 6 ft. long plastic tables tipped so the fuselage bottom sets flat on it while the front of the fuselage is supported by the main gear. As it worked out I raised the tail end with a piece of 4x4 post and then shimmed the nose end to a snug fit. I folded a packing blanket for padding to protect the underside of the fuselage. By only replacing one panel at a time I think it will work fine.
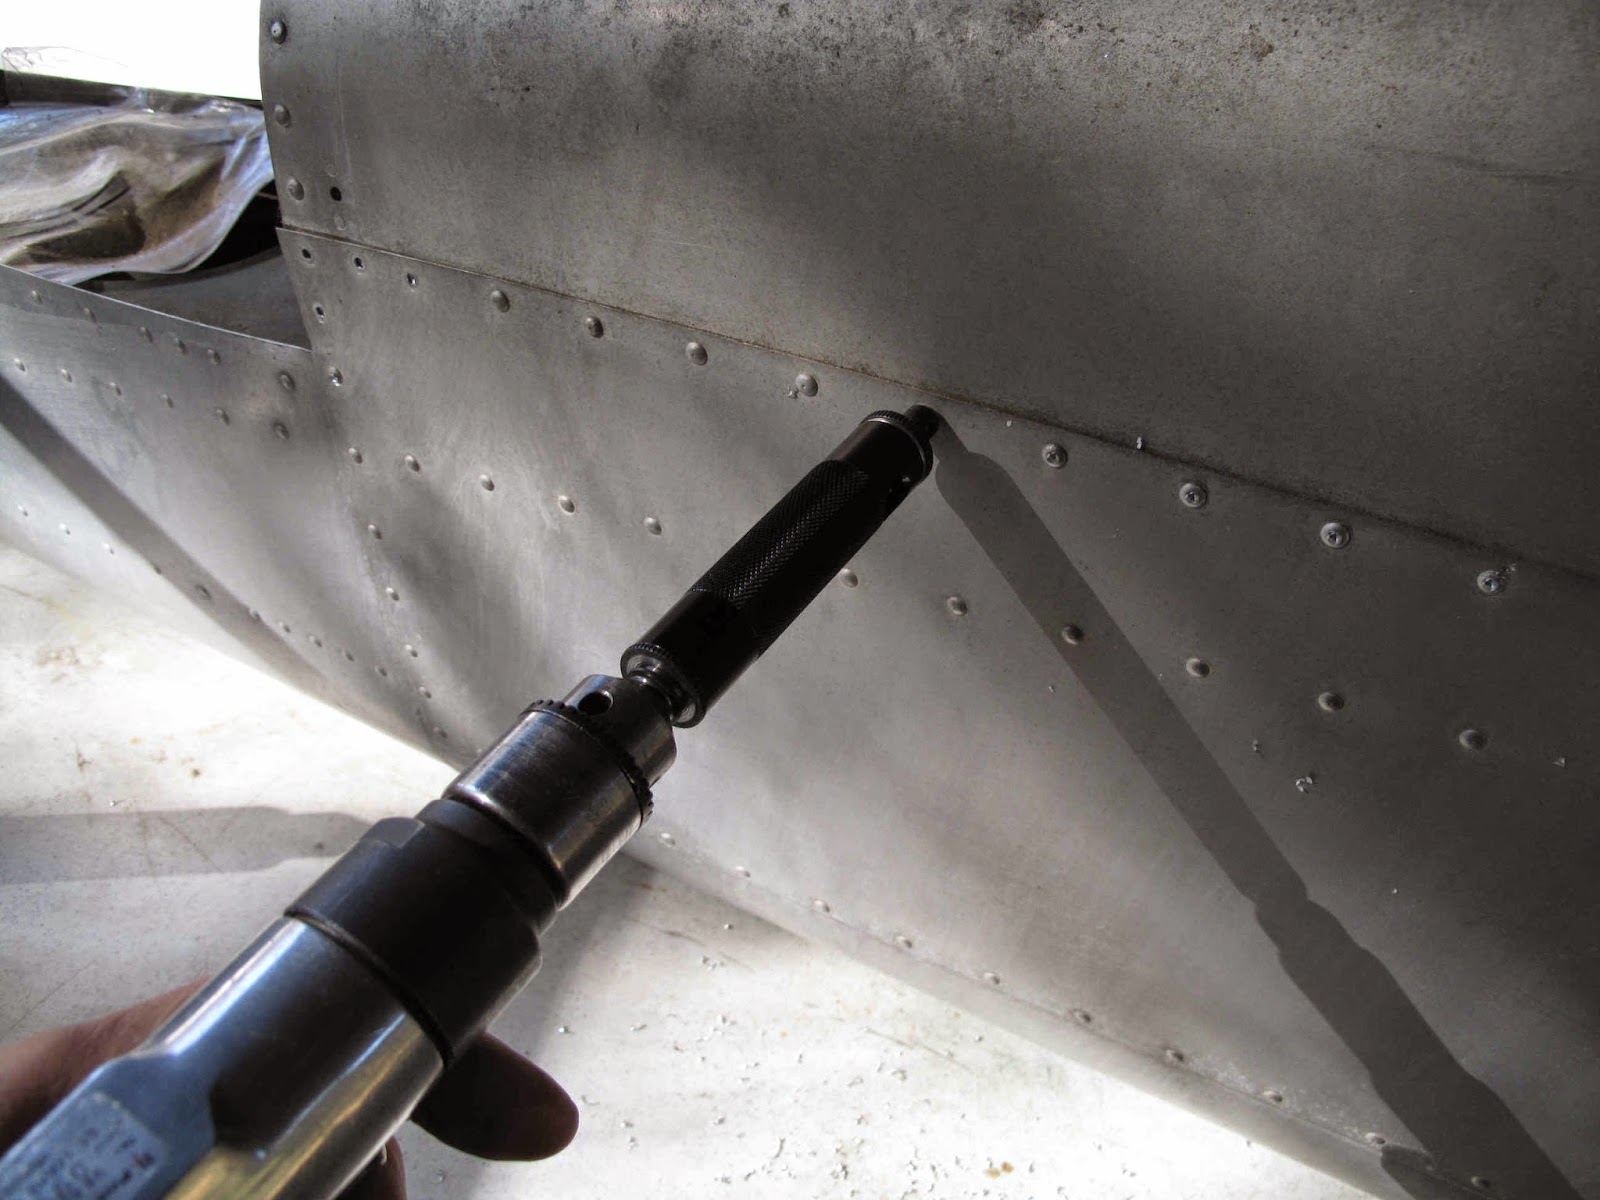
To remove so many rivets I purchased a
Rivet Removal Tool from ATS. I thought about making such a tool but they had exactly what I would have made and for less than $60. The tool has a drill in it which extends through a tube which fits snugly on the head of the rivet. It comes with drills and tubes to fit 3/32", 1/8", 5/32" and 3/16" universal head rivets.
You adjust the tube so the drill just penetrates to the bottom of the head. That way you don't damage the skin. The knurled nut locks the tube to hold its length. You need to hold the barrel while drilling so it stays securely on the rivet and does not spin. If it spins the lock not will not hold the tube and the drill depth will change. OK, I didn't ruin anything but I'm smarter now. Did I mention there were no instructions with the tool. I guess they thought it was as obvious as I did.
It doesn't perfectly center the drill so don't attempt to drill deeper than the rivet head. It does do it better than my best efforts with a center punch and guessing at the depth.
One thing I've learned removing rivets is that when the rivets are set the shank expands slightly to fill the hole securely. This is part of how they provide strength. When riveting in thin sheet metal this can lock the rivet into the sheet. Trying to pound it out will bend and damage the sheet.
A better solution is to switch, after drilling the head, to the next size smaller drill, and drill just through the depth of the sheets being held together by the rivet. This will allow the remaining tin walls of the rivet to loosen their grip on the sheets. For the 1/8" rivets along the sides of the fuselage I switched to a 3/32" drill and set the drill to extend about 0.050" - 0.060" beyond the end of the tube. Using the 1/8" rivet tube/stop re-drill all the rivets to the new depth with the smaller drill. The stop prevents drilling through the upset end of the rivet. For the rivet where there is also a bulkhead in the stack the depth has to be set that much deeper, etc. This method will allow about 80% of the rivets to be punched out with a spring loaded center punch. By carefully drilling the rest with a 7/64" drill until you just feel it hit the bottom of the hole you'll loosen most of the rest of them.

To remove the heads just stick a 1/8" pin punch in the hole, tip it off center and the heads pop off. That's the safest way to prevent scratching the skins. If that won't remove it you can use the pin punch and a hammer to carefully push the head off sideways.
For the few rivets which won't pop out with the spring loaded punch, I bought a cheap pair of diagonal wire cutters and ground the back side down to the point of the cutting edge with the belt sander. Also round any sharp edges. Now you just grip the upset end of the rivet with the cutters, rotate and pry it out.
While I've been removing rivets I've been installing Cleco Clamps in every other hole to hold things in place until I'm ready to remove the panel.
With the rivets removed a little wiggling got the panel out. It fits under the side panels and under the panel in front of it.
Now I need to fabricate a new panel from 0.032" 2024-T3 clad aluminum. Fortunately the material information is printed on the inside of the panel. I'll install the new panel with the printed side in for the next person.


No comments:
Post a Comment