 Yesterday I was able to get a second coat of white Poly-Tone on the right wing. Today I finished the left wing. They'll have some time to dry over Thanksgiving. After that we'll watch the weather for some warm days to get the yellow sprayed. At least they could be flown like this if the rest of the plane is ready before warm weather, fat chance.
Sunday, November 21, 2010
Second Coat of White on Wings
Yesterday I was able to get a second coat of white Poly-Tone on the right wing. Today I finished the left wing. They'll have some time to dry over Thanksgiving. After that we'll watch the weather for some warm days to get the yellow sprayed. At least they could be flown like this if the rest of the plane is ready before warm weather, fat chance.
Monday, November 15, 2010
First Coat of White
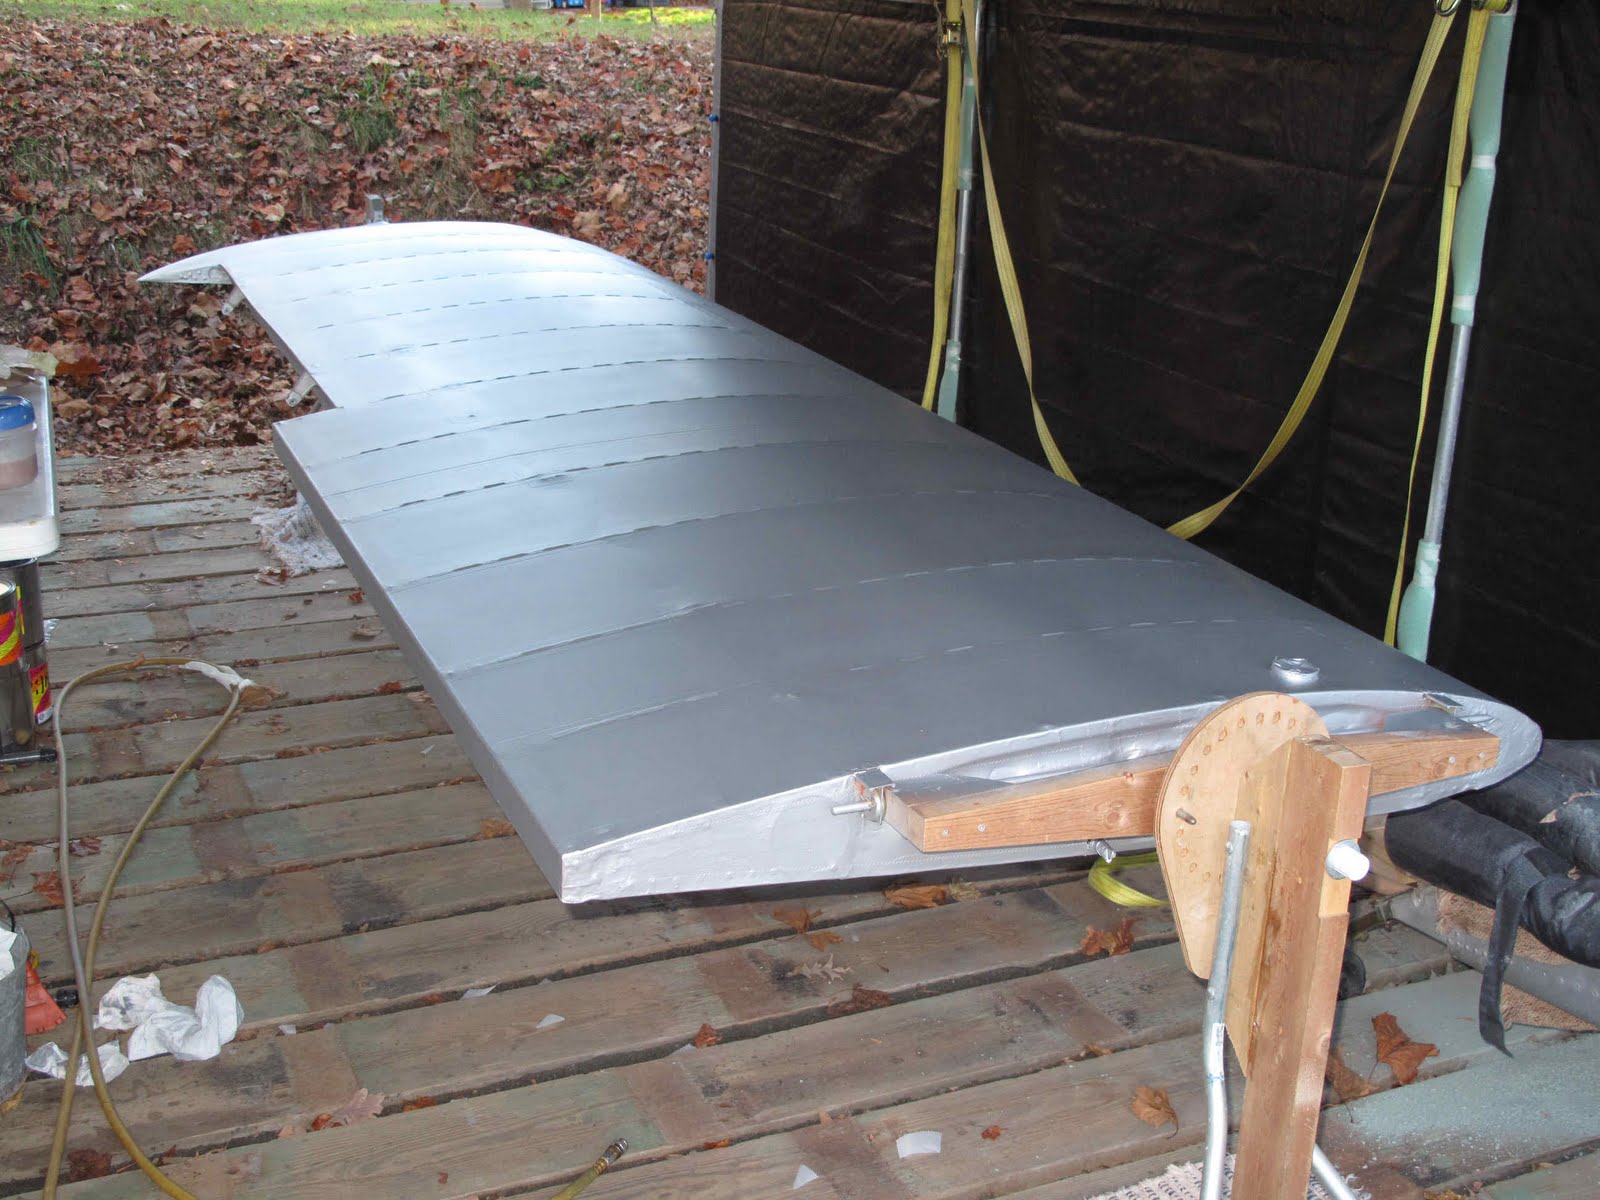
 I took this picture at this odd angle from the porch of the attic because I could see the faint grey spots in the white. Jim and Dondi had warned me that the yellow is very transparent since they eliminated lead from the pigments. Their point was that any shadow from the silver will show through the yellow. When I first sprayed on the white it looked so good I thought I could get away without a second coat. After talking to Jim he convinced me that there were visible shadows in the white. After looking at this picture they don't show in it. Anyway it is supposed to rain the next 2 days so we'll let the wings dry and hope its warm enough Thursday to spray a second coat of white. I've got a lot of work piled up in the shop so I guess the rain will give me a chance to earn some money to pay for all this good fun.
Sunday, November 14, 2010
Gear Legs Primed
 Both wings have now been sanded and resprayed with Poly-Spray. If the weather holds I'll start spraying color with Poly-Tone.
The gear legs are cleaned up and the step rivet holes inspected for cracks, fortunately none were found. I've sprayed the first coat of epoxy primer on the legs. I like epoxy primer better than zinc chromate. They'll get one more coat before putting them back on the fuselage.
I have 2 sets of wheels and brakes with the project, one set of Goodyear and one set of Cleveland. We'll try using the Cleveland assuming they clean up to be serviceable. I've started bead blasting the parts to remove paint and corrosion. At least the rotors cleaned up fine.
Both wings have now been sanded and resprayed with Poly-Spray. If the weather holds I'll start spraying color with Poly-Tone.
The gear legs are cleaned up and the step rivet holes inspected for cracks, fortunately none were found. I've sprayed the first coat of epoxy primer on the legs. I like epoxy primer better than zinc chromate. They'll get one more coat before putting them back on the fuselage.
I have 2 sets of wheels and brakes with the project, one set of Goodyear and one set of Cleveland. We'll try using the Cleveland assuming they clean up to be serviceable. I've started bead blasting the parts to remove paint and corrosion. At least the rotors cleaned up fine.
Saturday, November 13, 2010
Sanding Wings
 Thank heaven for a stand which easily rotates to a nice angle for working. I started with the leading edge at a lower angle, reaching from the leading edge side. Than between the spars at this angle from the trailing edge side. Last I tipped up the trailing edge to a comfortable angle and sanded behind the rear spar. Just a light sanding along the edge of the tapes and the open areas to get any specs of trash under the poly. You can really see any brush bristles left in the Poly-Brush, I thought I found all of them earlier.
Once it dried I sprayed another full cross coat of Poly-Spray. They really look good, not perfect, but I like how they're coming along. Tomorrow the other wing. These cool short days really slow things down.
Thank heaven for a stand which easily rotates to a nice angle for working. I started with the leading edge at a lower angle, reaching from the leading edge side. Than between the spars at this angle from the trailing edge side. Last I tipped up the trailing edge to a comfortable angle and sanded behind the rear spar. Just a light sanding along the edge of the tapes and the open areas to get any specs of trash under the poly. You can really see any brush bristles left in the Poly-Brush, I thought I found all of them earlier.
Once it dried I sprayed another full cross coat of Poly-Spray. They really look good, not perfect, but I like how they're coming along. Tomorrow the other wing. These cool short days really slow things down.
Thursday, November 11, 2010
Spraying Wings
The weather wasn't as warm today but I managed to get a second coat of Poly-Spray on the first wing and the first coat on the second. Tomorrow I'll be able to sand any spots which need it on the first wing and get a second coat on the other. They look good and are well covered so I feel very good about the results.
Wednesday, November 10, 2010
First Coat of Poly-Spray
 Good fun today. Now the wings are looking like wings. The Poly-Spray was easy to spray. We're getting warm enough weather to get one coat a day. If it holds I still may get to spray the color this fall.
 I'm also cleaning the rust from the gear legs. It's slow because I don't want to use to much sand blast pressure and I'm blasting the areas at a shallow angle to avoid peening the surface while scrubbing off the rust. They're cleaning up nice, just slow.
 Sunday, November 7, 2010
Removed The Main Gear
 The past three weeks have been very busy in the embroidery shop. Things have slowed enough to get some time on the fuselage. It's been to cold to spray on the wings. We may have to move them back up to the attic for the winter. Most everything has already been removed from the fuselage. There are a few steel parts which need to be removed and repainted, rusty. The gear legs are one of those and it seemed better to start there. We needed to remove them to properly clean them and epoxy prime the metal.
 To remove the gear you need to get at the main bolt in the fuselage. The Bolts that hold the wedges in are easy to get at from outside. The wedges jam the spring steel tight in the frame so the legs don't rattle around on landing. To hold up the fuselage and get the doors open the easiest place to support it is at the rear spar attach fittings, behind the doors. Two 2x4 rails were laid on the ground and vertical pieces cut to fit over the spar fittings. Diagonal braces were added to stabilize the posts and everything is screwed together. I put a bolt through the 2 cross braces just to make it more rigid.

Some weight was needed on the tail even without the engine or anything in the cabin. I used a 5/16" bolt so there wouldn't be any severe loads on the spar fittings. The fuselage just sets on the bolts.
 .
..
.
.
.
.
.
.
 With the doors open it was easy to get to the bolts. You need a 3/8" allen wrench for the bolt and a 12 point 9/16" wrench for the nut. A little tapping on the inside of the gear leg with a soft mallet got the wedges out and then it's just a matter of sliding the leg out. I thought I might need to support the gear but they don't move once the bolts are out.
 The mains are off and in the shop for cleaning and painting. I'll also clean up the wheels and repack the bearings so once it's all done we won't need to take any of it apart before the plane flys.
Subscribe to:
Posts (Atom)

