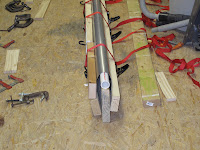
The first task was to fit the old skin back on the wing to make sure all the holes still align correctly so it can be used as a pattern for the new skin. Again Cessna did an excellent job making the parts the same. Everything aligns perfectly. While the skin was on I also marked any holes which needed to be ignored or had gotten elongated drilling out the rivets. There were extra holes from drilling out the welds. If a hole was elongated an arrow was drawn on the skin to show which side of the hole to use as a guide when punching the new hole (see the 3rd picture below).

After a careful cleaning of the floor the sheet of aluminum was laid out and 15" cut off for the new shin. Because this was thin enough sheet I used a Stanley knife and padded straight edge to score and break the sheet, much cleaner than snips. On thicker sheet like spar webs I use the table saw, noisy but very clean straight cuts.

By standing the strip on edge in a curve it is stiff enough to allow easy filing of the edge to clean it up and
debur it.

You can see some of the markings to help punch new holes correctly. Because of the curve of the old skin I'll work from the inside so all the markings need to be transferred to the inside of the skin. X's mark holes to ignore.


The old skin was then clamped to the back of the new skin. The only place I have that is flat is the floor so some 2x4s were used to hold the skins off the floor far enough to work with the Whitney punch. C-clamps and craft sticks, to protect the metal, were used to hold the shins from moving while new holes were punched. I started with the 3/32" holes between the ribs along the spar. They were generally the cleanest holes. As holes are punched
clecos are installed and the clamps removed.

These are simple matched hole construction methods. Go on line to the
EAA Sport Aviation library and look up John
Thorp's articles on building the T-18 in the early to mid 60's. Always punch any hole you can reach with the Whitney punch using a punch with the center nib carefully removed.

Holes that can not be reached are center punched with a duplicating punch and drilled using the old skin as an added drilling jig to help keep the drill bit from wandering. I will do the holes from the other edge after the bend is made, the skin is fitted and alignment holes located along the other edge.
 The ribs are riveted to the spar. I modified the long head of my rivet squeezer to fit loosely over the spar flange. There may be some heavy rivets it won't squeeze without bending but I mostly use it for 1/8" and 3/32" rivets so I don't think it will hurt it. The biggest problem I had was my rivet gun hasn't been used in years and the air valve was stuck. I also discovered that I do so little riveting I don't own any bucking bars. With 9" of snow falling I faked it and moved on.
 The skin below the tank is riveted to the spar and we're ready to set rivets on the skin and the drag wire brackets. Then the outboard skin can go back on. This was a very long day of going slow and careful. I don't want to have to redo this.


 I realized I have several 2'x4' plastic tables from Sam's which we use in the shop and for our booth at fly-ins. They are adjustable for height from 24" to 36" so they make nice work tables. Three of them nicely support the wing. After rem0ving the clecos I gently worked the spar loose. With a stool as a support at the root end the spar came off easily.


